OSHA Lockout Tagout: 6 Steps, Checklist & Tracking for Field Service
OSHA Lockout Tagout: 6 Steps, Checklist & Tracking for Field Service
OSHA 29 CFR 1910.147 requires a written energy control program built around a defined sequence of steps including preparation, shutdown, isolation, lock or tag application, releasing stored energy, and verification. Once your crew completes those steps and confirms zero energy through a physical try-out test, the machine can be considered safe to service. Your next move is documenting the procedure and training every employee who touches that equipment.
TL;DR:
- Lockout procedures must include detailed identification of energy sources, precise isolation points, and thorough verification through a physical try-out test.
- Compliance requires a written energy control program with scope, authorization, enforcement, device standardization, and detailed employee training and record-keeping.
- Tagout is only acceptable when lockout points are unavailable, and group lockout tasks demand procedures ensuring each worker’s safety with personal locks or lockboxes.
- Regular, documented inspections by a different authorized employee are necessary to verify the effectiveness of lockout procedures before restarting equipment.
- Maintaining updated, machine-specific records with clear documentation of procedures, training, inspections, and corrective actions is essential for passing OSHA audits.
Table of Contents
- What Are the OSHA-Required Lockout Tagout Procedure Steps?
- What Does an OSHA-Compliant LOTO Program Require?
- When Can You Use Tagout Instead of Lockout, and What About Group or Contractor Work?
- How Do You Verify Isolation Before Work Begins?
- What Should a LOTO Implementation Checklist Include?
- What Records Does OSHA Expect During an Inspection?
- What Actually Moves the Needle on the Shop Floor
- Where to Find the Official OSHA Standards
- Sources
What Are the OSHA-Required Lockout Tagout Procedure Steps?
An authorized employee follows a fixed sequence every time equipment gets locked out. Skipping a step or doing the steps out of order increases the risk of OSHA citations or serious injury during service calls.
Here’s the sequence as it applies at the machine, not just on paper:
- Notify affected employees. Tell everyone who operates or works near the machine that it’s going down for service, and roughly how long.
- Shut down the equipment using its normal operating controls, not by pulling a breaker or yanking a plug while it’s running.
- Identify and isolate every energy source. This means locating disconnects, valves, and blocks for electrical, hydraulic, pneumatic, and mechanical energy tied to that specific machine.
- Apply lockout devices to each isolation point. Tagout only substitutes for a lock when the equipment has no lockable device, and even then it requires additional precautions as specified by OSHA.
- Relieve or restrain stored energy. Capacitors, springs, suspended loads, and pressurized lines can still hurt someone after the main power is off, so bleed pressure, block loads, and discharge capacitors before anyone reaches in.
- Verify isolation with a try-out test. Attempt to start the machine using its normal controls, then return those controls to neutral before work begins.
Your machine-specific procedure needs to spell out details a generic checklist can’t cover. Appendix A of 1910.147 offers a sample format, but your document should list the actual energy types present, exact isolation point locations (breaker panel B, valve V4), and any voltage or pressure readings a technician needs to confirm de-energization.
Common energy sources demand different isolation tactics:
- Electrical: Open the disconnect, lock it, and test with a meter, not just a visual check of the breaker position.
- Hydraulic: Close supply valves, bleed residual pressure at a bleed-off port, and confirm gauge readings hit zero.
- Pneumatic: Shut the air supply valve, then vent the line through an exhaust point before locking.
- Mechanical: Block moving parts (gears, flywheels, cylinders) with pins or blocks rated for the load, not improvised wedges.
- Stored/residual: Discharge capacitors with a grounding rod, lower suspended loads to a resting surface, or lock out spring tension mechanically.
A job hazard analysis done ahead of time makes this whole process faster, because your team already knows where the isolation points sit and what “safe” looks like for that machine. If your shop hasn’t formalized that step, a structured job hazard analysis process pays for itself the first time a new hire has to lock out equipment they’ve never touched before.
What Does an OSHA-Compliant LOTO Program Require?
A written procedure covering six steps is only part of the obligation. OSHA expects a full energy control program with defined scope, clear authorization, enforcement, and standardized devices, not a single laminated sheet taped to a machine.
The program itself needs these elements in writing:
- A statement of purpose and the equipment it covers
- Procedural steps for shutdown, isolation, lockout/tagout application, and release
- Rules for who is authorized to apply and remove devices
- Requirements for device standardization (color, shape, size) so locks and tags are unmistakable
- An enforcement policy with consequences for bypassing the procedure
Training splits your workforce into distinct categories, and mixing these up is one of the more common compliance gaps. Authorized employees perform the actual lockout work and need training on hazard recognition, energy control methods, and the specific procedures for machines they service. Affected employees, meaning anyone who operates the equipment or works nearby, only need to understand the purpose of LOTO and the absolute rule against restarting locked equipment. Everyone else in the facility gets general awareness training. Training records must be certified, listing employee names, training dates, and the specific procedure covered.
Periodic inspections must occur regularly, with an authorized employee other than the user conducting and documenting them to certify effectiveness. An authorized employee who does not normally use that specific procedure has to conduct the review, confirm the written steps match actual practice, and interview employees on their responsibilities. Document the machine covered, the inspector’s name, the date, and any corrective action.
One procedure can cover multiple machines only when they share the same energy type, magnitude, isolation points, and configuration, a condition OSHA’s Appendix A addresses directly. A drill press and a hydraulic press rarely qualify. When in doubt, write separate procedures. Pairing this cadence with a broader preventive maintenance schedule keeps annual inspections from slipping through the cracks between service calls.
When Can You Use Tagout Instead of Lockout, and What About Group or Contractor Work?
Tagout is permitted only when the energy-isolating device cannot accept a lock, and even then, it does not provide the same physical guarantee as a lock and requires added safety measures. Using a tag requires additional measures such as removing a fuse, opening an extra disconnecting device, or blocking a control switch, on top of employee training that emphasizes tags are warnings, not physical restraints.
Group lockout situations require procedures that protect every individual involved, including the use of mechanisms such as group lockboxes and personal locks to ensure individual safety. The standard method uses a group lockbox: the lead authorized employee locks out the isolation points, places those keys in the box, and each crew member then applies their own personal lock to the box itself. No one’s lock comes off until that person is clear and confirms it verbally.
A few other situations carry their own rules:
- Contractors and outside personnel must exchange information with your facility about each other’s LOTO procedures before work starts, and your employees need to understand any unfamiliar devices the contractor brings in.
- Testing or positioning equipment during service sometimes requires temporarily removing locks. When that happens, clear the area, remove tools, reenergize only long enough to test or reposition, then immediately de-energize and reapply lockout before work resumes.
- Shift and personnel changes require a documented handover: the outgoing authorized employee transfers control formally, often by having the incoming employee apply their own lock before the first one is removed, so the machine is never briefly unlocked.
Group LOTO and shift transfers are frequent inspection focus points precisely because the handoff is where verbal agreements substitute for documentation, and that’s the gap OSHA inspectors look for first.
How Do You Verify Isolation Before Work Begins?
The try-out test is where most lockout failures actually happen, not at the locking step itself. Crews get comfortable, skip the physical attempt to start the machine, and assume the isolation worked because the procedure says it should.
Verification means physically attempting to operate the equipment using its normal start controls after locks are applied, then confirming nothing moves, energizes, or releases. This step alone catches missed isolation points, mislabeled breakers, and backfeed from adjacent circuits that a purely visual check would never reveal.
Before removing any lock or tag and returning equipment to service, work through this sequence:
- Inspect the work area for tools, debris, or loose materials left near moving parts.
- Confirm all personnel are clear of the machine and out of the hazard zone.
- Verify controls are in neutral or off position before restoring energy.
- Notify affected employees that lockout devices are about to be removed and the machine is returning to service.
- Have the same authorized employee who applied each device remove it.
Pro Tip: Run try-out drills with your crews on low-risk equipment first. Practicing the “attempt to start” step on a forklift charger or a bench grinder builds the habit before someone has to do it on a press brake under time pressure.
Only the employee who applied a lock or tag should remove it. If that person is unavailable, employers may remove the device only through a documented exception process that includes confirming the employee isn’t on-site, attempting contact, and getting supervisor verification before the machine restarts.
What Should a LOTO Implementation Checklist Include?
Rolling out a compliant program works best as a sequence, not a single memo. Start by inventorying every machine with hazardous energy, then build outward from there.
A practical rollout order looks like this:
- Inventory all equipment requiring energy control and flag shared energy characteristics
- Draft machine-specific procedures using Appendix A’s format as a baseline
- Assign and document authorized employees per machine or department
- Deliver initial training split by employee classification, then certify records
- Run pilot audits on your highest-risk machines before facility-wide rollout
- Schedule recurring annual inspections tied to a calendar system, not memory
Digital forms remove a lot of the ambiguity that paper checklists leave behind. A usable LOTO record should capture machine ID, energy types present, isolation point locations (with photos where possible), lock or tag serial numbers, the authorized employee’s name, a timestamp, and a verification signature confirming the try-out test occurred.
| Form Field | Why It Matters |
|---|---|
| Machine ID | Ties the record to a specific asset, not a general area |
| Energy type(s) | Confirms which isolation steps applied (electrical, hydraulic, etc.) |
| Isolation point location | Documents exactly where locks were applied |
| Lock/tag ID | Creates a traceable chain of custody |
| Authorized employee | Establishes accountability and removal rights |
| Date/time | Supports inspection and incident timelines |
| Verification signature | Confirms the try-out test was completed |
OSHA’s own implementation guidance points toward integrating LOTO into regular workflow systems rather than treating it as a standalone paper process, since separate systems are where records go missing. This can be centralized by storing machine-specific procedures, automating annual inspection reminders, and keeping training records tied to a unified login for work orders. If your current process still lives in binders or shared spreadsheets, a work order template system adapted for LOTO fields cuts down on the reentry errors that show up during audits.
What Records Does OSHA Expect During an Inspection?
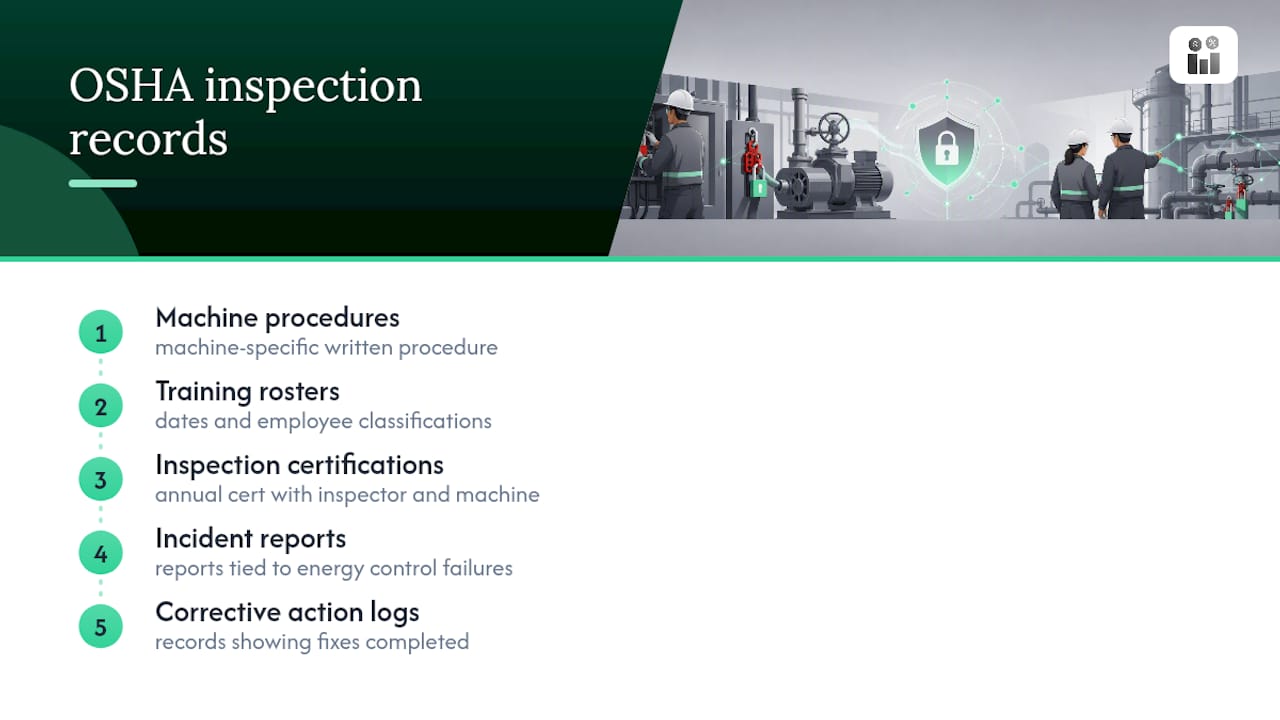
Inspectors want proof the program works in practice, not just that a binder exists. Keep these records current and easy to pull on short notice: written machine-specific procedures, training rosters with dates and employee classifications, annual inspection certifications naming the inspector and machine, incident reports tied to energy control failures, and corrective action logs showing you fixed what the inspection found.
The findings that show up most often during OSHA visits are predictable. A machine has no procedure specific to it, just a generic template. Tagout is used where a lock was available. The annual inspection got skipped or wasn’t documented. Verification signatures are missing, suggesting the try-out step didn’t happen.
Fixing these before an inspector arrives is far cheaper than fixing them after a citation. Build a proof packet per machine: the written procedure, the most recent inspection certification, training records for every authorized employee on that equipment, and any incident or corrective action history. Storing these in a document management system built for service businesses means you’re pulling a folder in minutes, not reconstructing history from email threads while an inspector waits. Closing the loop on any deficiency also matters. An incident reporting workflow that tracks corrective actions to completion is exactly what turns a documented near-miss into evidence your program actually improves.
What Actually Moves the Needle on the Shop Floor
Programs succeed when safety officers tackle the riskiest machines first instead of writing procedures alphabetically. Running try-out drills with real crews on low-stakes equipment builds the muscle memory that paper training never does. Automating annual inspection reminders through a suitable system, paired with the framework in KaiosMedia’s coverage of field compliance, closes the gap between what the standard requires and what actually happens at the machine.
— KaiosMedia
Where to Find the Official OSHA Standards
Keep these on hand as your primary references: the full text of 1910.147, the sample procedures in Appendix A, and the practical walkthrough in OSHA’s booklet OSHA3120. For building out your own tracking system, Firmanager centralizes procedures, training records, and inspection schedules in one place.
Recommended
Run your whole business in one place
CRM, quotes, work orders, invoicing, expenses, HR and HSE — one login, every device. Free-forever plan.
Start free →